Showing posts with label Sails - Hardware - Systems. Show all posts

Wednesday, February 18, 2009

Bolero's R & D Department

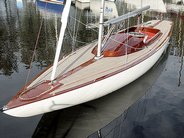
Kristian over at shields 88 is a constant source of inspiration and rigging idea for all things Shields. I tell you it is like have an R & D department. He just wrapped up a new boom for Peanut, his Shields, and it is choked full of ideas that I plan to flat out steal. If imitation is the highest form of flattery, Kristian better be prepare to be flattered.

Wednesday, October 15, 2008

Light Air Worries

It is funny how things can seem in hindsight. During the planning and construction phase I was worried that Bolero might disappoint me with her light air capabilities. Part of the root of this concern was a conversation I had over on Tim's Plastic Classic forum last December with Kristian.

Bill,

I'm really glad I came across your project. With a few exceptions there aren't a lot of people talking Shields online, even though Shields owners and crew tend to be pretty excited to do so in person.

And don't get too excited about the structural work I'm doing. #9's bottom is in much better shape than 88's. Also, I'm one of those "last inch" people when it comes to boat prep. Also(2) I'm jealous of 150's bottom, which is pretty flawless. To be quite honest, if I could I would send my boat to Tim for a (one design) restoration!, as he seems very good at what he does. I can promise you some very neat ideas when it comes to the rigging.

The Shields is a heavy boat, and needs a little work to get moving in the light, especially downwind. Definitely a great boat in a breeze; this years nationals had 2 races in the high 20's and I've never had such fun. For a couple cruise I'm comfortable in anything up to about 20 with standard sails. Over that and it just gets too wet, although the boats still very easy to control. A local sailor used to race singlehanded up to about 25, with a small reef in the main. By the way, has anyone told you about scoop mode yet? It's a unique condition of shields sailing that when close reaching in choppy seas, the jib tends to regularly deposit waves into the jib trimmers lap.

I've certainly thought about putting in an masthead sheave and getting a used T10 spinnaker. Problem is that the mast tip has a lot of unsupported length, and is pretty bendy (you should have seen it when we broke the backstay in 30kts) I think in order to do it right you'd need to add a set of jumpers or cap shrouds. That would make a MH sails more than just a 5kt affair. On reaches to and from the race course I've thought the better ticket would be some sort of jib top reacher, sheeted to the toe rail, or even the spinnaker turning blocks and barberhauled. I'm asking my sailmaker today if he has any thoughts on the subject, I've never taken this idea very far for OneDesign reasons.

Hope I haven't spooked you with the light air talk. While thats their weakness, they're still a pleasure to sail. In fact, I get a lot less frustrated in light air shields sailing than I do in the more modern raceboats I sail the rest of the time. You've picked a great platform for your project, as the boats definitely have that undefinable good feeling about them.


Kristian
What a difference some time at the helm makes. I have no complaints with Bolero's light air characteristics. What I have been thinking more and more about is setting her up for comfortable higher wind ranges. My best guess is that I am pretty comfortable up to 15 knots and expect that number to grow a bit with experience and proper rig and sail trim. After that I want to incorporate the flattening and two reef points that I added to the sail.

I have been playing with the approximate force on the sail for various sail configurations using the formula:

Sail Force = (Sail Area) (Wind Speed)^2 (0.00431) -- I found it on the Web so it must be right :)

Actually since I know that the force varies with square of the wind speed the exact value isn't important. What I am looking for is a feel for when I get overpowered and use that number to get a feel for a more appropriate sail configuration.

I find it quite impressive that Kristian can "couple cruise" in 20 knots and his friend can single hand in 25 knots. I have some learning to do.

My winter challenge is to find the real estate I need on the boom for all this stuff. Should be fun.

Tuesday, October 14, 2008

Beautiful Day, Frustrating Sail

Excited to implement at least one of Kristian's rigging suggestion (the jib pendant) I headed out to the boat for some tinkering and a sail. I tried a couple of different ideas of how to raise the jib to the 5 inch reference I got from Kristian but settled on this using items I had on hand.


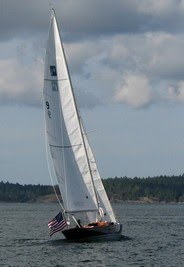
Please forgive my blurry photo, I was underway by myself in a nice breeze when I took it from the cabin. This seemed to improve the jib trim a little bit. I am optimistic that when I mount the ti-lites directly on the clew I may get the trim that I am looking for.

With the jib fix implemented for now, I plan to get a length of low stretch line this winter, I readied Bolero for some sailing. The forecast was for 10 to 20 knots out of the northwest and that is what we got.


I have to admit right up front that I am still not used to this boat when the wind starts to pipe up. Especially when I am single handing her. She has a lot more power than I am used to and she is a bit intimidating. I will also be the first to admit that I rushed Bolero into the water without everything being perfect or even intact (read reefing system). That said, this was the second time I had taken Bolero out alone with winds in the mid to upper teens and it was a bit windier last time.

Right away I became frustrated. Although there was a bit of wind and a pretty good chop it was the mainsheet system that cause me frustration and concern. It seems that in higher winds, and loads, the Harken Ratchamatic blocks (I have two 75mm) wouldn't release. I also noticed this the last time I was sailing in higher winds and it was quite disconcerting. Having to constantly worry about the mainsheet releasing during the puffs really threw off my concentration. Although the conditions weren't terribly severe, Bolero was healing plenty (with only my weight aboard) and it was a pretty wet ride.

I have a couple of videos showing how the forward line goes slack while the two 75mm Harken Ratchamatics dutifully continue to keep the main sheeted in.


In addition to my frustration I was pissed. I had worked hard trying to setup an easy to use mainsheet system and I was tired of it not working. So I sail back and forth on reach for a bit then sailed back to the mooring with the idea that I was going to figure this out.

The first thing that I did was to recreate the issue I was having while sailing. What I found was that by pushing hard on the boom and cranking down on the mainsheet (with the topping lift on) I could engage the ratchets in the Harken blocks. Then I would lift up (uncleating the Spinlock PXR) and release the mainsheet. The mainsheet would give just a bit and then stop hard.


I then pulled a fair bit of line aft of the swivel base block and repeated the test hand holding the mainsheet. This time the main ran free. So somehow there was just enough friction in the swivel base to keep the Ratchamatic from releasing.

Next I tried removing the spring between the Ronstan swivel base and the 57mm Harken block. It is hard to see in the picture, but the swivel base only allows this block to swivel in one plane so sometimes is seems that the mainsheet binds depending on the location of the boom and where the swivel is. This seemed to help a bit but still the Ratchamatics held firm. I retried my free line test just aft of the spinlock and everything work great.

Here is a closeup of the type of Spinlock PXR that have.


This cleat is size to handle line diameters from 8-10 mm or 5/16 to 3/8 inch. That blur of a line releasing in this photo is obviously not 3/8 inch. I found 3/8 very difficult to even thread through during installation. So perhaps this bit of friction is hanging up just enough to cause the Ratchamatics to stay locked on heavy loads.

In any case I am going to replace the Spinlock PXR with the Ronstan cam cleat that originally came with the Ronstan swivel base and repeat my test.

I also wonder if these Ratchamatics are a bit like the vacuum cleaner cord. That is you have to pull a bit and then release. If this is the case it seems they would work better with a cam cleat than the Spinlock.

Monday, October 13, 2008

Bolero Rigging Input

Kristian over at Shields 88 blog left me a comment on my Bolero May Never Get a Genoa post that I wanted to discuss in a bit more detail than I can easily do with comments so I reposted it below.

Your blog has been great to read, but the best parts have been imagining your joy at finally getting to sail the boat! She's still got all the good characteristics of the Shields and I'm sure will give you years of good times.

A couple thoughts: Is your mast blocked in at the partners? I can't tell in the photos but it looks like it may not be. Normally I like to have fitted delrin shims made up, but maybe spartite would be better for your uses.

The jib sheeting angle problem might be tough with the stock cut jib. We usually raise our one-design sails up so the tack is about 5" above the deck. Most people use a tied or spliced spectra loop. You could also get a couple inches by removing the pennant that holds the jib sheet 2:1 blocks to the sail, and get some Harken Ti Lites that you could lash directly to the sail. If thats still not enough it might be work getting the sail recut with a higher clew. At the same time you could have the clew grommet replaced with a webbed in ring, which would make attaching blocks easier.

But in the mean time, enjoy the last bits of sailing in 08! Niki and I just took our Shields out for a sunrise sail. Had fun and got some use (beyond racing) out of the boat. Also learned a lot, such as you don't need to be on the water at 430 when the sun doesn't actually come up until 645... woops.

-Kristian
Kristian is a professional rigger and Shields racing sailor (this year's Chicago Season Champion) and rebuilt his Shields, Peanut, at the same time that Tim was redoing Bolero (ain't she a beauty).


He has provided an amazing amount of great advice, some of which I may not have been smart enough take, and I was hoping that he would chime in after seeing some pictures of Bolero under sail and reading about some of my rigging issues.

Kristian is definitely right that it doesn't look like I have blocking between the mast and the mast partner. My ultimate goal is to come up with a similar system to yours but I was in a bit of a rush to get her launched this season. So I blocked the mast in at deck level with pieces of cedar shim. Tim and I had also talked about keeping the shims between the mast and the deck so as not to carry the load through Tim's custom mast collar.

Some deja vu about the jib setup. I was just rereading some Shields tuning tips on the North Sails website and noticed that they also raised up their jib.


I am going to follow Kristian's suggestion and raise Bolero's 5 inches as my new baseline.

I ordered my two part jibsheet blocks from Layline modeling the system off a the 29mm ti-lite setup that they had in their catalog. I ordered by phone and asked them to upgrade to the larger 40 mm and for some reason they switched my order to 2650 40 mm blocks. I have left a message but now I can't get through to anyone.


It was only after I really looked at the ti-lite blocks in detail that I realized that I could have done the work myself. So I am going to start over and follow Kristian's advice on this as well. I just don't think that I am that far off in the lead angle. The upper tell tails break just a bit before the lowers so I think the combination of Kristian's two suggestion might just work. I would really like to avoid changing the jib if I can.

My goal for next season is to set up Bolero much more like her racing cousins. The geometry of her standing rigging is still intact so I would like to use some of the vast amount of information that exists in the class archives to set her up next season. My best tacking angle has been about 115 degrees in moderate air so I think there is some room for improvement.

Update: And more from Kristian.
The blocking at the mast is really important for keeping the mast in column, and it also helps keep water out from below deck.

You might try http://www.spartite.com/ as lots of racing boats use that, and it makes a watertight seal.
Our jib tack height of around 5" off deck seems to work really well. When its this high, only part of the foot (about the middle 1/2) touches the deck.

If I were you I'd ditch the pennant on the jib blocks, and lash them directly to the sail. http://www.harken.com/pdf/4927.pdf

The photo of the jib looks pretty good, and I'd bet that if the clew gets a bit lower it'll be perfect.

Tacking angles vary depending on breeze, trim and hiking but we're usually about 100 at the widest, and sometimes it seems a lot closer to about 85.

kristian
More great info. Thanks Kristian.

The Harken's are on their way from Layline.


I am going out sailing today so I will raise the jib.

I have been looking at Spartite and will have it ready for next season. As cooperative as the weather has been, this season's fun is coming to an end. I am going to haul on Saturday.

Thursday, July 17, 2008

Spinnaker Furling

This is a topic for the future and I just wanted to get some thoughts down all in one place. I want to be able to sail Bolero in as wide a range of winds as possible. So I have been thinking quite a lot about light air sails. One of my hopes is to assemble a system that I can easily use in the lulls that can occur in between islands. My goal is to sail Bolero this season to determine what my light air requirements are and then decide on the type and size of spinnaker to use. This post will focus on the available spinnaker roller furling units that have come on the market. What I like about these systems is that I can store the whole system (spinnaker and furler) in a sail bag unless I need it and then use it as needed. But I can always get it below deck when I want it gone.

I am going to summarize my thoughts and information on 5 spinnaker furlers:

  • Bamar Roll-Gen (~$1900)
  • CDI Spinnaker Furler System (~$870)
  • Facnor FX 1500 (~$1084)
  • Harken Code Zero MKII
  • Schaefer System 650 (~$838)
One caveat. This is my initial investigation on spinnaker furler. All of this information has been obtained from the web from what I believe are reliable sources. But as of yet, I don't have any first hand experience. I will update this post as needed.

Roll-Gen

Design: Torsion Rope
Furling Line: Continuous
Drum Diameter: 5 inches
Weight: 8.76 lbs

The Roll-Gen is a continuous line furler that incorporates a caged drum to contain the furling line. It has the ability to be used with a quick release torsion rope or as a drum swivel system.


CDI Spinnaker Furler System
More info coming soon
Facnor FX 1500
More info coming soon

Harken Code Zero MKII

More info coming soon

Schaefer System 650

More info coming soon

Downwind Sail Options

North Sails

G-0 Gennakers
Derived from Code 0 asymmetrics used by winning Volvo Ocean Racers. Flat shape allows the sail to
be flown at tighter reaching angles.

G2 Gennaker
The largest and most powerful Gennaker we build. Excels in light-to-moderate running and reaching. Forgiving "sheet it and cleat it" shape.

G3 Gennaker
Our most versatile Gennaker. Same forgiving traits at G2, but in a smaller, flatter package. Great for light air tight reaching and running/broad reaching in all conditions.


Doyle Sails

Doyle has an interesting downwind sail that they call the UPS or Utility Power Sail. It is interesting because they claim that the effective wind range is 33-180 degrees AWA.

This is quite a bit more range than any other spinnaker I have seen. So I am a bit skeptical but also intriqued.

Thursday, April 10, 2008

When the S**t Hits the Fan

I have often joked that heads on small boats are designed to make airline lavatories seem nice. But when you gota go, you gota go. So most small boats incorporate some form of "facilities". As I mentioned in a previous post I had laid out a small porta potti for Bolero. That idea failed rather miserably so we needed to come up with an alternative that was still legal.

After some googling I came up with two. One to replace standing on the taff rail and one for the more serious business. These two option are the Travel John Disposable Urinal and the PETT Compact Dry Toilet.

These systems will be used based on our needs. For liquid waste we will use the very portable Travel John and for solid waste we will set up the PETT Compact Dry Toilet.


Travel John Disposable Urinal

Urinal Bags provide a safe and sanitary means of satisfying personal sanitation needs when permanent facilities are not available. Travel John is convenient, sanitary, discrete, and compact. The key ingredient is LIQSORB(TM), a combination of an exclusive, patent pending, biodegradable non-woven fabric pouch containing a biodegradable polymer substance that immobilizes bacterial growth quickly - absorbs the liquid waste and turns in into an odorless, spill-proof gel bag that is non-toxic and waste disposal safe. The unisex adapter makes it easy for anyone to use while standing or sitting, and a spill guard prevents back flow during use.

Men, women, and children, in virtually any place imaginable, (including airplane cabins and cockpits), can use Travel John with no mess or fuss. Its unique design prevents any leakage whatsoever in the event a full bag is dropped.

  • Designed for use by men, women, and children
  • Odorless and spill proof
  • No clean-up necessary - simply throw away
  • Compact and lightweight for optimal ease-of-use with convenience in storage (pocket, purse, flight bag, etc.)
  • Can be used while standing or sitting
  • Hygienic, non-toxic and waste disposal safe
And here are some reviews:
Tuesday, January 29, 2008
Great benefit to travelers
by Phil Kelley from Asheville NC

Pros: Excellent product for travelers
Cons: Does not zip closed.
Review: I'm a pilot and I travel a lot. This product is a lifesaver for men, women and children. I buy it by the case. When you finish using it, just fold the top over and hold it for a few seconds for the gel to work. Then dispose of it in a trash can. If in a plane, just put it at your feet or in a seat pocket until you leave the plane. One thing is for sure, for the price, it cannot be beat.

Thursday, January 03, 2008
Woman's point of view
by Pilatus gal from CA

Pros: Great fit for gals
Cons: Does not absorb all urine if filled to maximum fill line.
Review: Transcontinental flight for this big water drinker. The cup fit snugly, no leakage. However, stop urine flow well before the 28 oz maximum line as it will not absborb the last four ounces.

Saturday, December 08, 2007
When others are waiting
by A Customer from Birmingham, Ala.

Pros: Fits well in pockets and can be deposited easily in waste cans.
Cons: none
Review: Not being able to use "squat" toilets in China, I resorted to using the few of these a friend had given me years ago for something else. It alleviated a lot of worry and provided the kind of aid for moments when a line of people were behind me and muscles were beginning to lock up.

Sunday, November 04, 2007
by Brian from Chapel Hill, NC
Review: This product works okay, although I thought before purchasing it that you could ziplock it closed, however if you really fill it up it will gel up, but you have to sit there and hold it until you de-board the A/C. Although better than nothing in a pinch.

Tuesday, July 20, 2004
by A Customer from Indialantic FL
Review: a lifesaver in a pinch, beats a coke bottle any time!

What surprised me most about this system is how well reviewed it is. Once my wife and I got of the weirdness of the concept this idea really seemed like a good one.

PETT Compact Dry Toilet
  • Easy to use. No assembly required, sets up in seconds
  • Same Height and Size as a Standard Toilet
  • Folds into Briefcase Size with Dimensions of 19" x 14" x 5"
  • SANITARY: Utilizes degradable waste bags (WAG™ bags) that gel
  • Waste, neutralize odor and begin the decay process, which make this system spill proof and hygienic.
  • Special design of seat flange keeps outside of waste bag clean
  • STABLE: Three-leg design for stability on uneven terrain
  • LIGHTWEIGHT: Weighs only 7 lbs.

This system is a porta potti replacement. We already know, or hope, that this toilet won't get much use. During our normal day sails it will be stored behind the watertight forward bulkhead. I only anticipate using it when we are overnighting. It is a bit early to know for sure but I think that this toilet could be set up in the cabin for privacy during the day or in the cockpit for use at night.

Both of these systems work on the same principal. They both use a dry a non toxic biodegradable powder that forms a solid gel when exposed to liquid. After use they will break down in the landfill in less that a year. In many ways this seems ideal compared to the idea of a porta potti and carrying around and disposing of liquid and solides in the waste tank.

Time will tell but we have pitched the porta potti and I am not looking back.

Thursday, December 20, 2007

Cooking, Lighting and Heating

I have been trying to figure out a cooking and lighting solution for Bolero. Searching the web reassures me that this is a common conundrum among small boat sailors. This post is a summary of my starting point. A way to keep my thought on in one place.

Needs & Wants
  • A simple, portable and safe solution for cooking and lighting.
  • The ability to easily store everything in a bag or a locker.
  • A stable setup that can handle wakes and walking around the boat during meal time. One that I can comfortably leave untended for a bit.
  • The ability to create reasonable meals during an over night trip.
  • Some form of heating to take the chill off down below.
  • I want to try to standardize on one type of fuel. I don't want to have propane and alcohol or kerosene on board.
Not Really Needed or Wanted
  • I don't have any need or desire to cook while underway. All of the cooking will happen while at anchor.
I have been considering a couple of scenarios.
  • Propane for cooking and heating and propane or LED lamps for lighting.

  • Kerosene or lamp fuel for cooking, heating and lighting.
Propane

Let's start with propane. And when I talk about propane, I mean those little 16.4 oz Coleman Propane Fuel bottles. These have really become a standard for small camping and boating cooking and heating. The are a myriad of option for cooking, heating and lighting. So I will only show those that are interesting me currently.

For stove there are two off the shelf items and one modified stove that I like. These are all based on the old Sea Swing single burner type of stove that have been around for years.
Kuuma/Force 10 Seacook Stove

When conditions are really rough and nothing would be more comforting than hot food or beverages, this is the stove to have. Keep it stored out of the way until you need it, then mount it on its low profile bulkhead mount, conveniently located, using the quick-disconnect fitting.

Ball-bearing gimbal swings easily

Unique single-action pot holder accommodates any size pot up to 8'' D

A true regulator, not just a needle valve

Has a positive OFF position and precise flame adjustment

Standard 16.4 oz. propane canister

Canister provides over 3 1/2 hours of cooking on the high setting

Partially used canisters can be disconnected, then used again later

Makes a great back-up or auxiliary stove

An adapter for foreign propane canisters is available Spare Seacook Wall Bracket available

Forespar Mini-Galley Stove

The Mini-Galley 2000 allows cooking under adverse weather conditions in the cockpit or below.

The burner can be turned off and on instantly with no preheating or priming necessary.

A disposable propane cartridge gives up to 8 hours of hot, clean heat.

A simple valve permits any flame intensity.

Designed to accept U.S. Department of Transportation approved self-sealing propane bottles only.

This modern, attractive unit includes a low profile mounting bracket which allows the entire stove to be easily detached and stowed when not in use.

It features an all stainless steel gimbaled "basket" with springs that secure the cooking pot.

Modified Classic Sterno Aluminum Sea Swing Stove

The biggest beef that I have read about the two stove above is the small diameter of their cooking surface. The original Sea Swing stove could handle larger pans, pots or a pressure cooker . I don't know if this is a real big deal for me or not. I like the idea of a pressure cooker and with a pressure cooker nice fry pan I could cook many of the meals I have at home.

So this type of conversion or finding one of the original kerosene Sea Swings is appealing.

For heaters propane just rocks. I find it hard to go much further than Coleman's.
Coleman BlackCat Catalytic Heater with InstaStart

Provides comfortable warmth whether indoors or in a tent

Electronic ignition for quick and easy matchless lighting

3,000 BTU output operates up to 7 hours from one 16.4 oz. propane cylinder (not included)

Compact legs integrate into collar for easy storage

Portable easy-to-grip handle makes heater easy to carry
There is a lot that I like about propane. It is clean, quick and it is the fuel of today. The canisters are readily available (and even refillable if I want to go that route) and can be found at a reasonable cost for the amount that I will be using. Propane appliances, especially from the camping world, are available and there are lots of choices including a portable hot water heater. So what's not to like? Well I am just not to fond of the the little cylinders. I don't like having that much disposable packaging for so limited an amount of product. Also most of the storage on Bolero will be in the cabin and even though these are small cylinders, I can envision carrying two or three at a time so I still need to be mindful of propane leaks. I don't know if this a problem or not with these little canisters. But storage is something to think about.

Kerosene

What I really mean when I say kerosene is the more highly refined, lamp oil. I don't expect to be cooking, heating and lighting on a regular basis so I am not so worried about the high cost of this product. It will be worth it for elimination of the soot and odor.

For a stove the old Sea Swing with an Optimus burner would be my first choice. These seem quite well like my many who have them and I haven't found them that easy to find. I have heard that these were available in both kerosene and alcohol.

For lights I quite like the Weems and Plath yacht lamps. There are often review as not have enough light to read by but many people seem quite happy with them. The decision on lighting will have to wait until I know what kind of room is available in Bolero's cabin.


Summary of Fuel Properties

Here is a summary of the heat content of the fuels that I am considering.


Properties of Cooking Fuels
Fuel BTUs/gal
Propane 91,600
Alcohol 80,000
Kerosene 134,000

Tuesday, December 11, 2007

Wooden Spinnaker Pole

Update: Well the Ronstan spinnaker pole ends I order just don't look up to the task (they looked much stouter online) so they are going back and now I have to source something else. Hard to find external pole ends these days. I am planning a trip to one of the local marine consignment shops. Hopefully I can find a nice set of bronze pole ends.


Okay, this is pure folly. I admit it. I have no time to add a new project to my list but I am going to try to anyway. For some reason I have decided that I would like a wood spinnaker pole for Bolero. I have no good reason for this, I just want one. Oh, I could argue that the one that came with Bolero is beat up and shot (it is). Or I could say that the aluminum cast pole ends are pitted and ugly (which they are). But mostly I just like the idea of a varnish wood spinnaker on the foredeck or mounted to the mast.

This idea started out simply enough, I was going to buy a solid piece of Sitka Spruce and create a solid tapered pole. Then I stumble across hollow bird's mouth construction and I started down that path. But in the end I decided to make a bit simpler first attempt and follow the approach described in "Skene's Elements of Yacht Design" by Norman L. Skene and revised by Francis S Kinney.

Here is the spinnaker pole sizing table from Skene's.


I find it interesting the way they define the "Area of Spinnaker in SQ FT" as the base of the fore triangel times its height. For Bolero that equates to:
Area of Spinnaker = (9.4) (30) = 282 sq ft
From Skene's table the width of a tapered wooden spinnaker pole can be expressed by the equation:
Width = (Area of Spinnaker + 650) / 450
Plugging the base time height area from Bolero the pole width dimension becomes:
Width = (282 + 650) / 450 = 2.07 in
This seems a bit small to me but then I don't have any experience in wooden spinnaker pole design.

Skene also specifies that the tapered ends be 65% of the maximum section. This is often dictated by the available pole end fittings. In my case I have ordered Forespar RF601 1.5 in external Pole Ends.


Using the end fitting as the design parameter the middle of the pole becomes:
Width = (1.5) / 0.65 = 2.31 or approx 2 5/16 in
Using Skene's 20% wall thickness relationship t becomes:
Thickness = (2.31) (0.20) = 0.46 or approx 1/2 in
I sketched up these section as shown below.


So the plan is to wait for the pole ends to arrive and then make a test out of inexpensive wood and go from there.

Sunday, December 9, 2007

Anchor Locker Design


The anchor locker design has been one of the more challenging aspects of the Bolero conversion project for me. There is very little space to house a full size anchor and rode on the Shields. I am committed to carrying a properly sized and easy to use anchor on Bolero. It has often been suggested that I carry my anchor in the cockpit or cabin. But having done this for three years I have found many challenges with this setup. First, since I don't anchor often, the anchor tends to get buried in the cabin and becomes almost impossible to get to in a hurry. And second, Bolero will have a finished wood cabin and I can't imagine getting the anchor, chain and nylon rode in and out of the cabin without eventually damaging the finely finished interior.

I decided early on that the solution would be an anchor locker. Then I proceeded to conciously and subcouncisios ignore the whole thing until Tim finally dove in. Tim measured Bolero's forepeak six ways to Sunday and likewise measured the anchor. He then modeled the anchor in many different orientations inside the forepeak. After getting a pretty good idea of what might work he mocked up an anchor locker door that seemed right to him.


The full in depth details of Tim's mockup can be found in the Dec 7th log. I have to admit that on first looked I thought it was a terrible solution (even though I was the one who proposed it). I called Tim the next morning and was cranky and irritable basically because I thought I wasn't getting what I wanted. I couldn't imagine a way to use the anchor in this locker under sail. Tim was very understanding during this call. Especially considering the amount of time and effort he had into this mockup and layout. I decided to think about everything we talked about and call him back.

I made two decision immediately after calling him. First I called a friend with a Newport 30 who has a anchor locker design that he loves. But he wasn't home. Then I decided to created a mockup of the foredeck on my living room floor. I had just enough room in my small one bedroon house to layout the 11 1/2 ft foredeck from the front edge of the cabin to the tip of the bow. This was something I should have done months ago. Pictures, especially with wide angle lenses, distort lengths and sizes something fierce. Here is Tim's anchor locker mockup laid out on my living room floor.


You can't imagine my elation at the spaciousness of the Shields fordeck, especially once I moved the coffee table out of the way. Most of my concerns and worry was a direct result of the picture distortions. I quickly became comfortable that this design would work with some minor tweaking.

Another key to my new found enthusiasm was when I opened the anchor locker door all the way. I thought having the anchor locker door open all the way and resting on the toe rail might be a solition to the door being in the way of the jib during anchoring. For me the pieces were dropping into place one by one.

The next idea which seem to help was the inclusion of take apart hinges, like the ones shown, on both sides of the door. This would allow me to open the door on the windward side as I sail on a downwind reach. This would also let me completely remove the anchor locker door if I wanted it completely out of the way.

After another call to Tim and tentatively deciding where the bow chocks and deck cleat could go this anchor locker design looks good to go. In my enthusiasm I boasted to Tim that this was our last big hurdle. He laughed a little and promise we would have more. Even so, I am glad to have the bulk of this issue behind.

Sunday, November 18, 2007

Ventilation Distraction

I spent some weekend time rereading Tim's Daysailor site in preparation for Bolero's cabin mockup which is coming this week. This will be quite an interesting week since there are a number of decision that can't quite be made until the dimensions of the interior are known. I have been working with pretty accurate drawings but the exact locations of the cabin floor and cabin top are still fluid until Tim creates the mockup.

So I spent a little time yesterday on a tangent, ventilation. In many ways I would like this little boat to act like a "big" boat. There are many systems that I am willing to give up, but then there are others I would like to retain. Ventilation is one of those systems. I have also been drawn to having few stunning details on Bolero. So as I have looked around for a way to incorporate ventilation I have looked for a way that that really stands out.

While I was looking at cowl vents on the Mariner's Hardware site I ran across this picture a dorade vent installation forward of the cabin on a classic style boat.


There is a lot I like about this installation. Although I am not sure about the scale (I sent for more info) I like the way they used a smaller dorade box and vent to keep everything about the level of the cabin top. This seems like it would reduce the tendency of the cowl vents fouling the jib sheets. I also like the trim piece that they ran in front of the mast. I roughed up a mockup and added it to my current sketch. I don't think I have it quite right but is good enough for the stare and ponder stage.


Sunday, September 30, 2007

Winch Selection

The standard winches on the Shields class are a pair of Lewmar #6's for the halyards and a pair of Lewmar #7's for the jib sheets (I won't be having a dedicated pair of winches for the spinnaker). I am trying to decide whether to replace the existing tired winches with identical new ones or upgrade.

Lewmar - Ocean Standard Winch - 6 A Single Speed Aluminum

$101.80 (Mauri Pro Sailing)


Lewmar - Ocean Standard Winch - 7 A Single Speed Aluminum

$139.00 (Mauri Pro Sailing)


So this is the low cost identical replacement option. The total cost for four winches is $481.60 with a total weight of 5.8 lbs (a real racers solution). This is a perfectly adaquate solution as it has powered the Shields class for years.

My first thought of upgrading was using these same winches but getting the bronze versions. A bit of a step up in aesthetics.

Lewmar - Ocean Standard Winch - 6 B Single Speed Bronze - $126.40 (Mauri Pro Sailing)

Lewmar - Ocean Standard Winch - 7 B Single Speed Bronze - $161.00 (Mauri Pro Sailing)

Total cost is $574.80 with a total weight of 12.2 lbs.


I also quite like the look of chrome winches. Another thought is sticking with the #6's on the halyards but upgrading to chrome and use #14 chrome self tailing winches for the jib sheets.


Lewmar - Ocean Standard Winch - 6 C Single Speed Chrome

$126.40 (Mauri Pro Sailing)


Lewmar - Ocean Self Tailing Winch - 14 CST Single Speed Chrome ST

$333.70 (Mauri Pro Sailing)


So this is an option I would be more than happy to have my newly restored Shields. The total cost of this option is $920.20 with a total weight of 15.80 lbs. Again this is mostly aesthetic although the new sheet winches are more powerful and self tailing (which I am greatly tempted to get).

Ok, last option. For some reason I am greatly drawn to Andersen winches. I have read great things about them. They are stylish and because they have smooth drums I think I might be able to pass the jib sheet around the leaward winch and trim with the windward winch. I have use this method often in my Bluenose sloop (with the old Merriman winches). It allows me to trim from the high side and, if I need more trim, grab the sheet where it crosses and the cockpit and pull and trim, no winch handles.


Andersen - #10 Stainless Steel Standard Winch

$155.99 (Defender)


Andersen - #12ST Self Tailing Stainless Steel Winch

$482.92 (Defender)


So of course my favorite option turns out to be the most expensive (I hate how it always seems to work this way). The total cost is $1,277.82 with a total weight of 18.6 lbs). So for now I will think things through a bit and see if there are any bargains to be found.