Monday, May 17, 2010
Pre-Launch Update
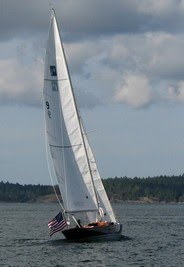
In any event prepping, rigging and transporting Bolero to the marina progressed without a hitch. I used the same technique to load the mast as I did last fall to remove it.
And it sure beats Craig and I walking each end up a ladder while trying not to ding anything. I am planing to sort through my old blocks and lines to see if I can't make the process even easier.
Raising the mast was quick and simple and it was great fun to hook up the new anemometer, which thankfully worked.
On Saturday San Juan Canvas came by with our new cabin cushions and they looked great.
It is hard to convey what a change the new cushions make to the interior. And although still small it is now an inviting place you would actually what spend time in.
There were a few periods of light wind so I played with the drifter to see if I could located the padeye on the foredeck. This new drifter idea has been a challenge from the very start. And as soon as I hoisted it I knew the journey was not to get any easier. Even though I was temporarily mounting it to the bow chock, it was very, very close to the headstay. I didn't realize just how close until we went out early yesterday morning in very light wind to check the hoist again.
Obviously I still have much work to do on this system and I have set it aside for now. Eventually I will need some sort of spinnaker crane. Which will entail working up the mast if I want it this season. I think the first thing I will do is fly the drifter inside the headstay to see how I like it and go from there.
Posted by
Bill Evans
0
comments
Labels: Projects
Tuesday, May 11, 2010
Rub-a-Dub
Today I moved Bolero out into a gorgeous Pacific Northwest day for a washing and scrubbing. Thus marking the end of our Spring refit. Tomorrow I will winch the mast onto the deck and Thursday it's down to the marina for an afternoon mast raising. This leaves me ample time to rig and organize the boat before Saturday when I have arranged to have Bolero hung from the travel over their weekend (Sunday & Monday) so I can finish the keel repair.
On a side note, having Bolero out in the open gave me a chance to see the new navigation lights that I installed. I searched for quite a while trying to find a set that would look right on Bolero. Now that I see them from a distance my choice doesn't seem quite as good as I thought.
Posted by
Bill Evans
3
comments
Labels: Projects
Monday, May 10, 2010
Almost Ready to Launch
We are looking good to go for our planned launch on the 18th. I have wrapped up, or will wrap up all my remaining tasks with the goal of pulling Bolero out of the boat shed for a good cleaning and prepping for the short ride to the marina on Wednesday the 12th.
Here is some of what I have been up to, in no particular order.
Bow Damage Repair
The most disappointing damage resulting from last summer's grounding was a nasty ding in the bow that resulted from a collision with the "rescue" vessel.
I have been procrastinating this repair a bit since I was quite worried about making a mess of things but in the end I needed to get it done.
First I worked to clean up and sand fair the ding so I could more easily fill the missing material.
Then I tried my hand at filling the damaged area without increasing the size of the damage too much.
I let the repair cure while I waited for Tim's two part primer repair kit to arrive.
Armed with Tim's great little kit and his "Dummies Guide to Two Part Paint Touch Up" instructions I dove in like I knew what I was doing and laid down multiple coats of the gray primer.
After another day or two of drying time I carefully sanded the primer and applied the flag blue touch up paint (which Tim had sent me last summer).
And all in all it didn't turn out to bad.
That said, I definitely don't want to become proficient at this task.
Electrical Panel
I have also been working on adding a small electrical service to Bolero. Nothing to grand, just power for a depth transducer and backup power for our battery powered gps and handheld VHS radio.
I pretty much have it done, although I have decided to add navigation lights so I have the panel cracked open for some mods.
Varnish Maintenance
The varnish gods, which smiled down on my novice skills as I varnished the boat (toe rails, coaming and cabin sides) where apparently angered by my lack of offerings and my efforts to lay down a nice finish on the hatches failed. I even sanded off my failures and tried again with similar, although slightly better result.
Ultimately I decided that I would contimplate these flaws all summer while studying up to try and figure out my faults and give it another go next spring.
Funny, with a nice controlled and convient shop setting I thought the hatches would be the easy job.
Posted by
Bill Evans
0
comments
Labels: Projects
Sunday, April 25, 2010
The Siren's Song
On this blog this title could mean just about anything but in this case it means varnish.
I have always loved boats with lots of brightwork so it was a foregone conclusion that Bolero would essestially become a wooden boat in a fiberglass hull. All along Tim warned me that I had better like varnishing and I replied that it was one of my favorite boat tasks. But truth be told, I hadn't done much varnishing before Bolero. And even though Bolero doesn't have has much brightwork as Cotton Blossom II, shown above, there is a bunch.
And this is the first year that I have been responsible for Bolero's varnish upkeep. Well the bulk of the refreshing on the hull is almost complete. And all in all I very much enjoyed the process. Varnishing requires a fair amount of work, and I have a great deal more to learn, but I just love the look of fresh varnish on wood.
I have to confess that I was a bit anxious about all this varnish work. After all I received Bolero from Tim freshly varnish by hands much more skilled then my own. But the only way to get experience was by doing it and the "nice" thing about varnishing is that there is always next year.
I still want another coat on the toe rails and the hatches are waiting their turn in my shop but we are one giant step closer to launching. What with all this shiny wood looking for water.
Posted by
Bill Evans
0
comments
Labels: Projects
Saturday, April 24, 2010
Some Forward Progress
This has been an unusually frustrating spring refit. It seem like I have been taking two steps back for every step forward. But little by little it seems that I am starting to make some headway.
Light Air Drifter
I am working to set up a drifter on a free furler just in front of the headstay and behind the bow chock. The general idea was a furler that can snap shackle to a padey with furling line blocks on the bow cleat and shroud base. From the very start this this has been painful a project. First I couldn't find a way to mount a structural padeye. Then I couldn't find a way to mount the Harken free furler such that the lead would clear the anchor locker. In the end the Harken furler went back to MauriPro (great service by the way) and I am waiting on a replacement Schaefer 550 furler. I still don't know if I will get this to work but at least I have a few new "good" ideas.
Toe Rail Break
The shift in my spring refit frustration was definitely a result of fixing the break in the port toe rail splice that occurred last summer.
As I mentioned previously, I tried and failed repairing this split with West Systems 105 epoxy. I prepped the split as much as I dared and injected thickened epoxy into the joint. Clamped it up for two days and it stayed together for about a minute. Having quickly surpassed my limited, okay nonexistent, skills I consulted a professional and asked Stephen Brouwer of Hunter Bay Woodworking to come over and take a look. He suggested I take another shot with West Systems G/flex epoxy. He has had some success with this product on teak and he had some material that I could barrow. If this failed it was probably fill and fair time.
I did a much more aggressive prep job this time. I worked a piece of 220 grit sand paper into the crack cleaning and sanding both edges. Then I solvent washed the joint and let it dry. Then I injected the G/flex, clamped up the joint and waited through two rainy spring days.
When the clamp came off I got this.
Okay, not the prettiest joint in the world but it was holding. So I sanded it and prepped it for the varnishing that was in its near future.
And after one coat it ain't looking to shabby.
Time will tell if this repair will hold up but I am cautiously optimistic.
Wood Movement
Wood movement on the parts of Bolero constructed of wood, and there are a lot, has been a continuing problem. Currently the forward bulkhead, the sliding companionway hatch, the aft deck hatch and the cabin floor access board have warped or twisted enough to affect their function. Most are just a little annoying but the sliding companionway hatch had become almost unusable as it was binding on the aluminum rails.
While Stephen Brouwer was over advising me on the toe rail break repair we spoke at length about these issues but unfortunately their really isn't a cure or a fix. The long term plan is to remake the hatches allowing for better movement of the wood.
For the short term I need to find a way to get them functional for this season. And as I mentioned it is really only the sliding companionway hatch that is truly problematic. All of these parts are back in my small shop getting ready for varnish. Since I know that the problem was less when the wood dries out during the summer I decided to see if lowering the moisture content and raising the heat in my shop would help. Can't really hurt but it isn't a solution either.
Electrical System and Instrumentation
I decided last season that I wanted to add some additional instrumentation to Bolero. After some research I discovered that I could add a NMEA depth transducer that would send depth readings directly to my Garmin 276C gps. But that transducer needed a power supply. So I decided that it was time to add an electrical system to Bolero.
The first problem was were to put a panel. Space is always tight and finding an adequate space that is also usable adds to the dilemma. Somehow I came up with the idea to use the chainplate box that Tim had built to cover up the chainplate knees.
In a way this idea seemed a bit crazy with my first thought being that moisture could be a big issue. So I took the cover off the starboard chainplate box and found it to be dry and very well sealed. I will definitely keep my eye on this to make sure nothing changes.
Here is the current state of my electric panel construction. The solar panel charge controller and the switch panel have been mounted and I am waiting for one more part before I mount the voltage and amperage gauges and their control switches.
And here is a view of the backside showing the battery mounting location.
I plan to have mount points for two of my small batteries so I can add extra capacity as needed.
Obviously from the size of my battery I am not running very much load. Currently all I will be running is power to the gps and to the depth sender unit. Although future plans may include a set of LED navigation lights and interior lights.
In addition to depth I also wanted to add a wind strength indicator. And what I really, really wanted was a wireless Tacktick system. But its cost just wasn't it the cards for this season. So with a bit of research I discovered the Inspeed Vortex Anemometer. It is a simple winds speed only anemometer that uses a bike computer for its display.
So know our mast head looks like this.
Cabin Cushions
Having done such a great job on the exterior canvas, Laura thought she would build the cabin cushions as well. Problem was that her other passions weren't cooperating. So I decided to send the local canvas shop an email asking for a quote. A few emails later and a trip to Friday Harbor and next thing we knew Derek from San Juan Canvas was over measure Bolero for cushions.
We will now have new cabin cushions prior to launch day. And I (Laura was out of town ) choose to add a touch of color to Bolero's interior.
Varnishing
And last, but certainly not least, we come to varnishing. Having removed all the parts I could remove, to varnish separately in the shop, I needed to decided what got varnished this year. So I started taping. In the end I decided to varnish all of the exterior varnish except the cockpit seats as they are fully covered when not in use and they still look good. In addition I didn't refresh the interior varnish, which we really haven't used much.
Currently I am done with the first of two refresher coats.
Posted by
Bill Evans
1 comments
Labels: Projects
Tuesday, April 13, 2010
The Smell of Anti-Fouling Paint in the Morning
A combination of other projects and some late winter weather has helped me procrastinate really starting Bolero's Spring refit. But over the last couple of weeks I dove in and repaired the keel damage from last year's grounding and today I painted the bottom.
This is the best way for me to start the Spring refit since I now have the worst job out of the way. Well mostly out of the way since I still need to repair the underside of the keel while we are hanging from the travel lift the weekend before our launch (May 18th).
I also pulled Bolero out of the shed for a thorough cleaning.
Varnishing is next and all the removable pieces are at home in my small shop. I do however have a couple of wood issues to deal with prior to varnishing. Last summer the splice joint in the toe rail cracked. I have tried to re-bond it but I was unsuccessful. It is a pretty small crack so I am leaning towards filling it and then fairing l as needed.
The other problem I am having is warping and twisting of Bolero's hatches. The sliding companionway hatch now binds enough that I can't easily open and close it.
In addition to maintanence and repairs, Bolero is getting a fair number of upgrades.
- A simple electrical system to power a NMEA depth transducer, our Garmin 276C GPS, and perhaps a few other luxuries
- A larger drifter on a roller furler
- Cabin cushions (I hope)
- A masthead anemometer
- And hopefully a mounting system for our Sea-Swing stove
Posted by
Bill Evans
0
comments
Labels: Projects
Monday, August 3, 2009
The Mighty Auk, an Iain Oughtred Dinghy
As I mentioned in a previous post, I want to replace my crappy Livingston dinghy with something more appropriate to use with Bolero. Originally I was thinking of going with a the Chesapeake Light Craft Eastport Pram.
Although I still quite like this design, I have change my mind. I have decide to order the plans, and have a go at building the Auk dinghy designed by Iain Oughtred.
So why the Auk?
First, I am looking for a number of improvements over my current dinghy.
- Better Aesthetics - Let's just say much better aesthetics. In my mind the Livingston dinghy is just plain ugly. It would be one thing if they were great dinghies, but I don't think that they are. I found that they are terrible rowers, and mine doesn't carry that much (we have the smallest one I think)
- Load Capacity - One of the many downsides to our current dinghy is that it is really only a two person boat. So it is really a quite a challenge to take someone else sailing with us. Our hope is to be able to carry three, or four in calm conditions, so we can can go sailing with friends.
- Sea-Worthiness - Often we row out to Bolero against a small westerly chop. Just enough, it seems, to splash over the bow of the Livingston and send water down the continuous center seat into my backside. In addition, with the twin hulls, the Livingston is very prone to steer into the wind. So in stronger winds it is quite difficult to row in a direction off the wind.
But an equally important reason for building an Auk is that I have always had a small wooden boat itch. In fact my first boat was a Koralle bilge keeler that I never quite had time for. In addition, now that I have a small shop, I want to learn more about working with wood and boat building. I am, however, a complete novice. So plenty of mistakes and missteps await. I can hardly wait.
The plans are available from the Wooden Boat Store as the 7' 10" Acorn Tender
Or directly from Ian Oughtred as the Auk.
Iain's contact info is:
I think I am inclined to order the plans, via mail, from Iain. Update: I dropped a check in the mail to Iain today (3 August 09).Iain OughtredStruan CottageBernisdaleIsle of SkyeIV51 9NSTel: 01470 532732
Being that this is my one stop location for all things Auk, I am adding some some additional design info.
And links to forum posts that have building information.
- Iain Oughtred Yahoo Group (Membership Required)
- Builder's Blog - Aukie
- Duckworks Building Article - Kitsetting Glued Lapstrake Boat Designs
- The Wooden Boat Forum - An Oughtred Auk
- The Wooden Boat Forum - Oughred Auk
- The Wooden Boat Forum - A small light dinghy to be carried on deck
- The Wooden Boat Forum - Oughtred's 7'10" Acorn tender
- Books - Clinker Plywood Boatbuilding Manual
- Books - Ultralight Boatbuilding
Posted by
Bill Evans
2
comments
Labels: Classic Boats, Projects