Showing posts with label Bolero Design. Show all posts

Thursday, December 31, 2009

Bolero's Specifications

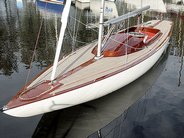
This page represent most of the pertinent design data, specifications and some of the philosophy for Bolero, our modified Shields One Design. It is a combination of data from the current configuration as well as historical data on the Shields class. I have already posted much of the data elsewhere, but I wanted to summarize it one location.

History

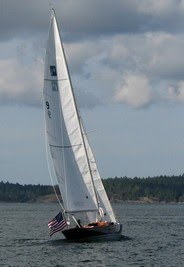
Our Custom Knockabout Sloop, Bolero, was converted from Shields #9 which was one of the first 20 Shields built by Cape Cod Shipbuilding during the 1960s.

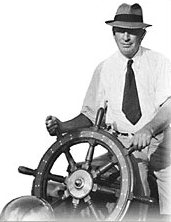
The class was conceived in 1965 by Cornelius “Cory” Shields of Larchmont, New York and designed by Olin Stephens (Design Number 1720) as a replacement for the International One Design class, IOD. 

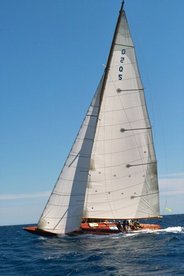
The Shields have an impeccable pedigree and the result is a beautiful boat that can sail in any weather and is easily steered and driven. It is easy to see why she has been called "A Mini Twelve Meter".

About 257 Shields have been built by three builders.

Boats 1 - 20 (Cape Code Shipbuilding)
Boats 21 - 190 (Chris Craft)
Boats 191 - 199 (Hinkley)
Boats 200 - 257 and counting (Cape Code Shipbuilding)

Shields Principal Dimensions

LOA = 30 ft - 2 1/2 in
LWL = 20 ft

Bow Over-Hang =  4 ft
Stern Over-Hang = 6 ft - 2 1/2 in
Bow Entry Angle = 25 deg

Maximum Beam = 6 ft - 5 1/4 in
Waterline Beam = 5 ft - 8 1/4 in
LWL / Max Beam = 3.1

Draft = 4 ft - 9 in
LWL / Draft = 4.2

Displacement = 4672 Lbs
Displacement = 73 cu ft

Displacement to Length Ratio = 262

Ballast = 3080 Lbs
Ballast / Displacement Ratio = 67%

Center of Buoyancy = 54.3%
Center of Flotation = 54.4%

Center of Buoy from DWL = -0.945 ft

Prismatic Coefficient = 48.75%

Wetted Surface Area = 150.8 sq ft

Pounds per Inch Immersion = 435.2 lb/in

Sail Plan

One of the main draw for using the Shields as the candidate for a modern Knockabout Sloop conversion was her sail plan and ballast ratio. I was looking for a boat that I could easily single hand and for me that meant a fractional rigged boat with a large SA/D ratio.The following is a summary of Bolero's (almost completely unaltered from the original Shields) sail plan and rig data.

I = 29.8 ft
J = 9.3 ft
Jib Area = 139 sq ft

P = 33.3 ft
E = 13.3 ft
Mainsail Area = 221 sq ft

Mainsail Aspect Ratio = 2.5

Working Sail Plan 100%
100% Sail Area = 360 sq ft
Sail Area / Displacement = 20.8
Sail Area / Wetted Surface Area = 2.4
Sail Area / Ton = 157 sq ft / ton

Light Air - Spinnaker
Sail Area =  644 sq ft
Sail Area / Displacement =37
Sail Area / Wetted Surface Area =4.3
Sail Area / Ton = 280 sq ft / ton

Moderate Air - 1st Reef
Sail Area = 324 sq ft
Sail Area / Displacement =18.7
Sail Area / Wetted Surface Area = 2.1
Sail Area / Ton = 141 sq ft / ton 

Moderate Air  - 2nd Reef
100% Sail Area = 276 sq ft
Sail Area / Displacement =16
Sail Area / Wetted Surface Area = 1.8
Sail Area / Ton = 120 sq ft / ton

Heavy Air - 2nd Reef & no Jib
100% Sail Area = 137 sq ft
Sail Area / Displacement =7.9
Sail Area / Wetted Surface Area =0.9
Sail Area / Ton = 60 sq ft / ton

Deck Layout

Maintaining the functionality of the original Shields Deck Plan was quite difficult due to the addition of the cabin and the aft deck access hatch. The cabin extends over the location of the original jib fairlead tracks and the aft hatch cut through the structure that supported the under deck back tension system.

The jib leads turned okay mounting them all the way forward on the top of the cabintop. For optimum jib trim they would still be a bit further forward or lower (like the original).

The backstay tension system is currently above deck but needs to find a way back under the deck and routed around the aft locker hatch.


Misc Empirical Values

I calculated a few other of the well know, although some have highly debated merit, empirical ratios just for the heck of it. The values for the Shields are compare to the Bluenose Sloop (my last sailboat) and the Atlantic Class (which was on my short list for this conversion).


Links & Resources

Tim Lackey (Northern Yacht Restoration)  - What more can I say about Tim Lackey. He was the heart and sole of our Shields Knockabout conversion project. I innocently stumbled unto his site with a vague idea of a future boat and dropped him an email. The rest as they say became history. His vision, discipline and work ethic are completely responsible for the artwork that we now sail.

Kristian Martincic (Chicago Yacht Rigging) -Kristian is a Shields racer and a professional rigger who bought his own Shields and was restoring around the same time as Tim was doing Bolero. He gratefully took us under his wing and corrected some of the larger flaws in my novice rigging choices. His web site is full of great ideas even if one choose not to races.

The Salvage of Shields 231 -Proof that there is a sailing god and karma. Somehow the gods decided that old Shields #231 should be raised from the depths of the Long Island Sound and they seemed to direct H.L. DeVore and friends to get her done. This feet and the brilliant restoration makes our own efforts seem just a little easier. And in a proper dose of karma Mr DeVore took his beautiful Shields to Chicago and won the 2009 Shields Nationals.

Shields National Class Association - The governing body of the Shields One Design Class.

Orange Coast College School of Sailing and Seamanship -This is a sweet sailing school down in Southern California which operates a fleet of Shield for their Keel Boat classes. I cleverly enrolled my soon to be new wife in a beginning Shields sailing class. Luckily for me she greatly enjoyed it since the first year of our marriage was all about Tim Lackey and Shields sailboats.

Bolero Initial Inspection Report (Tim Lackey) - This is the initial inspection that Tim performed on Bolero

Bolero Construction Log (Tim Lackey) -Tim's daily work logs during construction.

Shields Brochure - Vintage Cape Cod Shipbuilding (pdf link)


Shields Brochure - Vintage Chris Craft (pdf link)


Shields Brochure - Current Cape Cod Shipbuilding (pdf link)


Bolero
Shields # 9: 1967 - 2008
Modified Custom Knockabout: 2008 -

Tuesday, August 4, 2009

That Sinking Feeling

I guess the truth of the matter is that all sailboats can sink. Similar to the line in the Titanic movie:

"She's made of iron, sir. I assure you she can, and she will." -Andrew

The lead in a keel boat will gladly help a sailboat head to the bottom of the sea given a chance.

This came up today because I received this message on positive flotation from Bolero's original builder, Cape Cod Shipbuilding. This guidance was in response to a recent sinking of a Shields class boat during this summer's Edgartown Regatta. Unfortunately this isn't an isolated event.
Cape Cod Shipbuilding would like to take this opportunity to share general air tank information with all Shields owners. Please feel free to share this information with owners who have not received it. The flotation system in the Shields consists of 4 air tanks; one in the bow, one in the stern & 2 in the floor. When the Shields buoyancy was initially tested during design development, a Shields was tied to our dock swamped for 8 hours & never sank. The tanks held air & kept the deck above water level. New Shields are built with the same buoyancy to prevent sinking. However, over time damage can occur to the air tanks that can cause a boat to sink if swamped.

Air tanks in Cape Cod built boats can be easily tested & repaired. An air tank test kit can be purchased through us that includes the tools needed to test, drain & install new tank test plugs. Each floor air tank comes with a threaded tank test plug. To test, find the tank test plug in the bilge, remove it with an allen wrench. If there is a slight inrush or outrush of air, the tank may be tight. If no air exchange is noticed, put pressure in the tank (1 to 2 P.S.I.) by the use of an air compressor, or bicycle pump. Build up pressure in the tank and hold it for 5 to 10 minutes. If there is still pressure, the tank may be tight. It is possible that the pressure is closing a crack shut, so multiple tests may be necessary. If pressure is lost, build back pressure and listen for air escaping to locate the leak. Sometimes the leak is too small to detect by ear and a 50-50 solution of water and a liquid dish detergent can be made to help find the leak. Apply this solution with rag or small disposable paint brush around the areas you suspect are leaking. Large bubbles will indicate the location of the leaks.

A few owners have inquired about buoyancy bags; In order to put enough buoyancy bags in the Shields to keep it floating, they must take up the same amount of space as the 4 existing air tanks. Repairing damaged air tanks as opposed to modifying with air bags is the better solution. Once you have determined there is a leak, it must be properly repaired. Once the leak is repaired, re-test as you may find smaller leaks. Plastic inspection ports are not recommend in any of the air tanks to pump out the water. This adds one more hole in the air tank where leaks could occur & plastic inspection ports fail under pressure. The proper solution is to make the air tank tight. The Chris Craft Shields were never built air tight but they can be repaired to be air tight. Many of the tops of the Chris Craft bulkheads were never fiberglassed to the underside of the decks.

Common causes of air tank failure:
  • Teak Handrail & Toerail fastenings over time can elongate the hole in the fiberglass, or replacement teak trim was improperly installed/bedded.
  • The athwartships teak floorboard support that holds the turning button is fastened to the 2 floor air tanks & the fastenings can elongate the hole in the fiberglass over time.
  • Water if left to freeze in the bilge over the winter can put cracks in the floor air tanks.
  • Air tank hatches with 2 hook style hatch latches on each hatch. This system does not prevent water from pouring in during a swamping. It is imperative that Shields with the 2 latches per hatch be upgraded with 4 new wing nut style latches per hatch. All hatches need good gaskets in order to create an air tight seal.
  • Most aft tanks have an adjustable backstay and an ungasketed hole where the backstay lines go through the bulkhead. These holes allow water to enter the aft airtank.
We recommend checking your air tanks each year and always comply with class rules for safety equipment. When installing new hardware keep air tank integrity in mind; use gasketed thru-hulls and properly drill, tap & bed all fastenings. Everyone wants a fast boat but safety should be our number one priority.

The Goodwin's
I believe that this photo (which I have posted many times before) is the test that the Goodwin's are speaking of.


Bolero is no longer representative of the Shields class boat as tested in this photo. During her major redesign and renovation the floor / seat tanks were remove. Therefor, it is my belief that should water get below, into the cabin, she would sink like a stone. In this respect she is very much like any keel boat with a cabin.

But in many ways she is still an old Shields at heart which definitely separates her from a more traditional cruising, weekending or day sailing keel boat.
  • She doesn't have cockpit drains. So in the event of a knockdown or any event that floods the cockpit she will have to be bailed out by hand and quickly to prevent water from getting down below and sinker her.

  • She still maintains the low freeboard that I suspect is one of the main culprits of the various Shields sinkings that have occurred over time.

  • She still carries the large sail plan of a race boat.
I do believe, however, that Bolero is more resistant to sinking than a stock Shields. Although she has lost part of the permanent buoyancy from her original design we have the added benefit of a bridge deck and an enclosed cabin. In addition we have a reef-able sail plan which would never be available to the racing Shields.

Here is our plan to prevent knockdowns and flooding on Bolero.
  • Sunny and Beautiful - Life vests and throwable cushions handy and the companionway hatch is closed without any hatch boards in place. This is how we spend most of our time under sail.

  • Pre-Reefing Conditions - Pretty much the same as above except the backstay, outhaul, cunningham and halyard have all been tightened to flatten the sails and reduce heel. This is great fun.

  • First Reef - When it is time for the first reef the life vests come on and the first hatch board goes in. This effectively doubles the height of the bridge deck.

  • Second Reef - We haven't experience condition that require this yet. But depending on how it feels either one additional hatch board goes in or we close the cabin up. In addition a locking pin goes in the sealed aft deck hatch.

  • Drop the Jib -Again no direct experience here. But this will be our last weapon as the condition worsen. The cabin will definitely be completely closed up. In addition I would likely tether myself to the topping lift for work on the foredeck in conditions that require this amount sail reduction.
One frustrating and nice thing about Bolero's cabin is that the hatch boards and sliding companionway have an incredibly tight fit. Certainly they aren't watertight but there won't be water gushing in and they aren't going to float away. Also the addition of Bolero's cabin created a cockpit with less volume. So Bolero will float higher in the water with the cockpit flooded than the Shields did in the above test. Hopefully that would create an easier baling situation.

Not the I have any desire to test this theory.

Thursday, July 30, 2009

Happy Rebirth Day

Depending on your point of view, Bolero, our modified Shields Knockabout Sloop is either 42 years old or 1. She was originally built by Cape Cod Shipbuilding in 1967 but her life was renewed about 1 year ago today when Tim Lackey gave her a Hollywood Makeover.

From this:


To this:


The funny thing is that it seems like we have owned her for much longer than a single year. And as is fitting, I guess, for a well used and well loved boat she is no longer the runway model she was when she left the protection of Tim's shop.

But one of the greatest aspects of having Tim rebuild her to such a high standard is that I have no excuses. I know what she should look like. Though I realize that it is unreasonable to think I can maintain her in showroom condition, I do intend to maintain the high bar that was used during her planning and construction. Well that is within the limits of my skills and capabilities. But I try to have a realistic view of what I can and can't do and I am more than willing to seek help or advice or higher expertise as required.

What I already know is that this Fall, Winter and Spring will be a real maintenance year. Not the fiddle around in the boat shed I got to enjoy last Winter.

Sunday, September 21, 2008

Bolero's on Her Way

Well we are back from a three week holiday in Wales and Ireland and Bolero's is on her way. So there will much more activity here in the coming weeks. But first some much needed sleep.


Thursday, August 14, 2008

Design Odds and Ends

Well now that the construction of Bolero is completed, obviously the design phase is over. But in cleaning up my files I ran across some information that I don't think I posted so I am adding here for posterity. Much it may be a bit cryptic as it was my quick and dirty pre-design work.

I started out summarizing all the information that I could find on the Shields design. This a summary of the principal dimensions of the Shields and some of the calculation that I performed to determine the viability of this project.


Part of these calculations are left over from an early concept when I thought I would have an electrical system and a high capacity bilge pump. Cost, weight and simplicity requirements bumped that early on. I had also decided to maintain the Shields existing water tight bulkheads and this combined with a water resistant cabin created, what I felt, was a much safer Shields. So these choices help remove the need for high capacity pumps.

For pure informational purposes only, I plugged the Bluenose, the Shields and the Atlantic Class (an early option for this conversion) sailboats into various formulas to get a feel for how they compared to each other.


I did this completely for fun. I don't have any first hand experience on the validity of any of these factors.

One of the thing I look hard at throughout Bolero's conversion was sailing ability. To that end I compared the sailing characteristics of my old Bluenose with my estimate of the final version of what Bolero would become. My initial plan was to keep Bolero's weight change below 20% or about 920 lbs. This number is a bit arbitrary, although I have read some references to support it, but it is also quite a bit below the PHRF stated crew weight of 1,260 lbs. My goal was to keep Bolero from beefing up during this conversion in any way that would significantly reduce her sailing performance.


I was impractical, if not impossible, to determine the exact difference between the weight removed from Bolero (which was surprising large) and the weight added with the cabin and cockpit modifications. Even so, Tim and I have a pretty good feeling that any weight gain should be modest. I also think I have enough information to determine an approximate weight gain from how Bolero floats on her lines. Time will tell.

My goal is to continue studying sail combinations and wind performance so I can provide the simplest sail combination that allows Bolero to sail in the widest variety of wind ranges (I don't really enjoy rowing).

Over the three years that I have been planning and research for this conversion I have compared the sailing and physical parameters of many, many sailboats. Mostly they have been older, and sometimes wooden, classics. This is a very brief summary of some of these.


The Cape Dory Typhoon is there because she was the runner up during my last boat purchase (the Bluenose Sloop won out). I compared everything to the Bluenose to help get an idea of what was similar and what was different.

The Atlantic Class One Design was actually first on my list for this conversion. And I really like this design. But since I didn't have access to either of these boats I had to perform three dimensional pre-design and mock-up sketches and drawings to determine the viability of succeeding with the Shields or the Atlantic hull. In quickly became apparent to me that the Shields had a great margin of safety in achieving my goals. The Atlantic had even less freeboard and her mast is even further aft. I won't say it would have been impossible but I was struggling to find a way so the Shield won out.

As request, here is a pretty current sail plan and deck plan for Bolero.


Friday, August 1, 2008

Bolero Project Cost Breakdown

I wanted to post a summary of the costs for this project. At one time I was thinking of putting up actual numbers but I have decide to go the qualitative route instead. Below is a summary of the cost breakdown for Bolero's conversion. I have included everything. For instance all shipping, taxes, licenses etc.


I find that one of the hardest parts for a project like this is comparing it to other boats that are nothing like this. It is so easy to get into the mindset of "wow, this is lot of money for 40 year old boat when you could just buy...". The reality, that is sometimes hard to remember, is that you can't get this boat for the cheap money older boats sell for and a new "Daysailor" cost many times Bolero's conversion cost.

That said here is my report card on my project cost guestimation.

Shields Initial Puchase: +50%

It seems my budget became obsolete from the start. I had hoped to find an old Shields on an existing trailer in my price range. Instead I found #9 without a trailer for that price. So I "got" to add a new triad trailer. This also include all initial taxes and licensing fees.

Converstion Costs: +66%

I had a very rough quote from Tim at the beginning with a very wide range that didn't specifiy anything about parts, labor or task description. But it was all I had at the time It helped with our go-ahead decision. I had always assumed the highest number and we exceeded that.

Rig Modifications: +12%

This turned out okay. Probable because I knew so little about this task that I over budgeted it. Included in this is all new shrouds and stays, running rigging, blocks and deck hardware.

Transportation: +0%

Well this is obviously a statistical gift. I absolutely flat out guessed at a number and got lucky. It turned out that Bolero was shipped twice. Once from Connecticut to Maine and from Maine to Washington state.

Overall: +49%

Funny, I have read more than once to raise your budget by 50% on jobs like this. I / We (I got married during this process) are not at all surprised by these numbers. We committed to this job knowing that we were going to follow through with whatever financial resources it took to achieve the magnificent results we envisioned (and got). My thinking process was that the best way to control runaway costs was by having boundaries. That is why Bolero started out from a relatively small boats (Shields 30, long but skinny). That is also why there is no engine (well one of the reasons anyway) or electrical system. In the end we have ended up with an essentially new, custom Knockabout Sloop on a new trailer with nigh a compromise in sight.

Tuesday, July 29, 2008

Sweeeeeet!


Friday, July 25, 2008

Would You Trust This Guy?


Done Next Week... Done Next Week... Done Next Week... Done Next Week... Done Next Week...

Wow! There were times I wasn't sure I would hear these words. But "Done Next Week"! Wow! Okay the end of next week. And it is still the "goal.

The irony of course is that we weren't sure so I reschedule the shipping to mid September. Bummer. So now Bolero gets to spend the next six weeks tucked away in Tim's other bay while I wait patiently. Well sorry, that's a lie. But I will wait none the less.

I sort of like the contrast of Tim's face next to Olin's. I think the old man would approve of Tim's handy work.

Friday, July 18, 2008

Funny How the Mind Works

It is funny sometimes how my mind works and how new ideas come to me. Yesterday I was assembling my anchor rode and I was trying to remember the marking scheme that Tim used on Glissando. I googled his site and accidentally stumbled on a neat cockpit table idea that he designed.

Basically he installed a deck fill and cover into the cockpit sole and tapped and screwed an aluminum pipe for the pedestal. He mounted a flange for the pedestal under the new table top.

Bolero has two elliptical hatches. One in each water tight bulkhead. The aft hatch will remain the fiberglass original. But Tim is going to remake the forward hatch out of a nice piece of wood. It occurred to me that this 24" by 16" hatch might make a nice sized cockpit table using Tim's method.

Some brainstorming, some emails and calls to Tim and the plan really started to take shape.

The forward hatch will be held in place by two snap apart hinges like we used for the anchor locker. This will allow me to hinge the hatch in a raise position and have access to the forward locker or remove it completely to use as a table top. The, soon to be constructed, cockpit sole will incorporate a deck fill. I also thought we could hook up the bilge pump to this deck fill plate. I had decided weeks ago to forego any though holes in the hull. The plan was to have a hose under the sole than could be lifted over the side as needed. Now I am planning to carry a length of hose that can be threaded into the deck fill plate when I need the bilge pump. This really simplify the logistics of trying to get the bilge pump discharge house out from under the cockpit sole.

The proof will be in the pudding but I like the way this detail is working out. Also I like it when things do double, or triple, duty. I also thought that maybe the short section of the two piece oar might work as the table pedestal but that may be pushing it a bit...

The Best Laid Plans

The original plan was to have Bolero home for a glorious summer of sailing in San Juans. Alas this just wasn't to be. With a bunch of work still to go and a planned vacation at the end of August I finally (and painfully) came to the decision that I needed to move her shipping date till after our return in mid September. This means, if all things go well, she should be here around the fourth week of September.

Even though I have occasionally pushed the sailing season into November, realistically it wraps up in October. This combined with the fact that I have some rigging work to do before I can launch means there is a chance that Bolero will no get launched this year. I will play it by ear. If things go well and I can get her set up pretty quickly we may just get crazy and launch for a couple of weeks of sailing and then haul her back out and put her away for the winter.

Wednesday, July 9, 2008

Color me Blue

This project has been a long distance affair which has been orchestrated with photos and emails. Through the year long process there have been a number of photos that I have anxiously waited for for various reasons.

The first was seeing a picture of Bolero on her new trailer at Tim's shop. There was a bunch of logistic hurdles required to buy the boat and trailer and for Tim to retrieve her. So it was with much glee that I got to stare at this one:


The next two photos were Tim's mockups. Even though I had spent countless hours laying out this conversion on drawings and sketches, the proof was still to be found in Tim's shop. I breathed a big sigh of releif when I saw that sitting headroom was going to be possible and that the overall concept was looking very nice.


The next great photo was the completion of the structural modifications. This was really the first time that I could see how she really looks. Both the 2D drawings and Tim's cardboard mockups were pail approximations of the final result. There is just no way to simulate the richness of teak and mahogany.


This photo brings us up to the present. I have been waiting, not so patiently, to lose the original paint scheme. This is the week it is happening. Monday the deck highlights became Alexseal Snow White and yesterday the topside became Alexseal Flag Blue.


There are still two more photos that I anxiously await. A picture of Bolero all finish sitting outside Tim's shop. And of course the picture of her floating on her lines in her home port of Fisherman Bay.

Tuesday, July 1, 2008

A stroll in the sun

Yesterday Tim prepped for todays priming by striking the waterline. This resulted in Bolero getting out of the shop and into the Maine sun. Here are a few pictures. Of course you can find many, many more on Tim's log.


Friday, June 27, 2008

Anniversary of Sorts

Tim pointed out that today (June 27th) is an anniversary of the Bolero project. Even though I have been thinking and planning for a project like this for years and Tim and I started emailing and discussing specific plans last January it was one year ago today that Tim went down to Mystic Connecticut and inspect Bolero.


She has come a long, long way.

Friday, June 20, 2008

Okay, I'm Way Behind!

For a bunch of reasons I am a number of posts behind where I would like to be. I expect to catch up this week so some new posts will slip in behind this one (since I have already started them and they are in the queue). Until then here is my new favorite Bolero picture. She now has her new toe rails.


It is also time to start picturing her with dark Flag Blue topsides and white bottom paint. Sort of like this with much shallower pockets.


Friday, May 30, 2008

Bolero Visit

In what seems like a major case of closing the barn door after the animals have escaped, we are going to visit Tim's this week and have a look at Bolero. At first this seemed mostly like a way to waste some of Tim's time while I sit and stare at this boat that I never seen but coveted from afar. But after some thought, discussion and rationalizing there are a number of topics that can't be easily answered without us being on the boat. So I have started a list of items that we hope to resolve, or at least discuss, while we are there (in no particular order).

Oar lock position and mounting and oar storage.

This is pretty self explanatory. I am trying to find a convenient and strong place to mount the oar lock. The sort of obvious place in on or near the toe rail but that has some problems as well. I need to actually work the oar and see what the boat geometry looks like.
Foredeck hand rail
All along I have been attracted to the classic foredeck hand / foot rails found on boats like Sparkman & Stephen's Gimcrack or the Luders L-16. There are a number of reasons that I am drawn to this concept. First I just think it adds a classic look to this type of boat. But also these boats had pretty huge foredecks and I think that walking from the mast to the headstay would be much easier with a solid place for your feet or hands. In addition I like the idea of being able to tie the jib down to the deck. But... I need to see a mockup of this in person to be sure.


Sheet winch, jib lead cars and track location
Basically just a prelimary chat with Tim about rigging preferences. There has been enough changes to Bolero that the existing hardware will need to find new homes and I also have some preferences in mind.
Toe / rub rail design
Well I envision this will be me throwing a temper tantrum until we find something I like or I like what I finally get to see in person. Should be interesting.
Boom vang and rigid vang feasibility
I want to try and see if I can actually fit a boom vang and rigid vang on Bolero now that she has a small cabin. It was tight before so I just don't know. I may poke around the mast and boom hardware with a tape measure. I really want to find a way for this to happen.
Shake Tim's hand
Tim has brought an incredible amount to this project and I just have to meet and shake his hand (well and maybe have a drink or two). It is not often that I meet someone who is talented enough and crazy enough to take on and succeed in this type of project.
I am taking my camera and lots of memory so expect a full field trip report with plenty of pictures.